
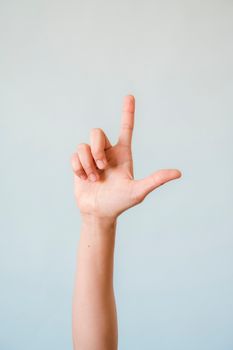
You are introducing yourself in an ASL class and want to say, “I teach,” but your hands keep forming a regular letter O. That small handshape difference matters. To sign “teach” in ASL clearly, use both hands in flattened O handshapes near the upper face, then move them forward in a short, controlled motion. The sign can be remembered as taking knowledge from the mind and sharing it with someone else.
How to sign “teach” in ASL
The standard sign for “teach” uses two hands and is usually produced near the forehead or upper sides of the face. Follow these steps slowly before blending them into one fluid sign:
- Raise both hands to approximately eye or forehead level.
- Form a flattened O handshape with each hand by bringing the fingertips together toward the thumb.
- Keep the hands separated rather than touching each other.
- Orient the palms generally toward each other.
- Move both hands forward together in a short, deliberate motion.
- Depending on the sentence, signing style, and intended meaning, the forward movement may be performed once or twice.
The motion should come primarily from the forearms and elbows. Avoid sharply flicking the wrists or opening the fingers as the hands move. Both hands should travel at the same time and remain balanced on either side of the signing space.
Getting the flattened O handshape right
A common beginner mistake is forming a round O, similar to the handshape used for the fingerspelled letter O. For “teach,” the handshape is flatter. Hold the four fingers together, bend them forward at the large knuckles, and bring the thumb toward the fingertips. The result may resemble a flattened beak.
Keep the handshape comfortably closed rather than squeezing the fingers and thumb together. Excess tension can make the motion look stiff and may cause hand fatigue during practice. If your fingers do not bend easily, use a comfortable approximation and focus on maintaining a recognizable location, orientation, and movement. Clear communication is more important than forcing a painful position.
Location, orientation, and movement
Knowing the handshape alone is not enough. ASL signs are distinguished by features including handshape, location, movement, palm orientation, and nonmanual signals such as facial expression. The National Institute on Deafness and Other Communication Disorders’ overview of American Sign Language explains that ASL is a complete natural language expressed through movements of the hands and face, with grammar that differs from English.
Location
Begin near the upper face, usually around the forehead or temples. Some fluent signers produce a more relaxed version slightly lower, but beginners benefit from practicing the clearer upper-face location first. Starting at the chest can make the sign harder to recognize or give it an overly casual appearance.
Palm orientation
The palms generally face inward toward each other rather than directly toward the viewer. The hands remain apart, with the fingertips pointing somewhat forward. Avoid rotating the palms dramatically during the movement.
Movement
Move both hands forward together. A common dictionary form uses two compact forward movements, with a slight reset between them. A single forward movement also appears in natural signing, particularly when “teach” functions as a straightforward verb in a sentence. Regional background, rhythm, emphasis, and individual signing style can affect how the movement looks.
Using “teach” in a sentence
ASL is not English performed word by word with the hands. Sentence structure, eye gaze, pointing, facial grammar, and context all help identify who teaches, what is taught, and who receives the instruction. For that reason, learn the sign as part of complete ASL sentences rather than attaching it mechanically to English word order.
Possible practice concepts include:
- “I teach ASL.”
- “My mother teaches math.”
- “Who teaches that class?”
- “Tomorrow I will teach children.”
- “I enjoy teaching.”
The exact ASL structure may differ according to context. Establish the subject through a pronoun, name, or point in signing space, then use the sign for “teach” naturally within the sentence. When asking a question, appropriate eyebrow position, head movement, and eye contact contribute to the grammar.
Does “teach” mean the same as “teacher”?
No. “Teach” describes the action. To sign “teacher,” sign “teach” and then add the person or agent marker. After the forward movement of “teach,” change both hands into flat handshapes. Hold them on either side of the torso with the palms facing inward, then move them straight down a short distance.
This compound can be understood as TEACH plus PERSON. Do not simply repeat “teach” and assume repetition turns it into “teacher.” The downward person marker is the important second part.
English words such as “teach,” “teaches,” “taught,” and “teaching” do not each require a completely different basic sign. Time signs, sentence context, movement changes, and other grammatical information establish when or how the teaching occurs.
Common mistakes to correct
- Using round letter-O handshapes instead of flattened O handshapes.
- Beginning too low on the chest instead of near the upper face.
- Moving one hand before the other rather than moving them together.
- Opening and closing the fingers during the forward motion.
- Making large throwing movements instead of compact, controlled movements.
- Looking only at your hands and losing eye contact with the other signer.
- Assuming ASL follows English word order in every sentence.
Another mistake is practicing exclusively from written descriptions. Text can explain the sign’s components, but it cannot fully show timing, rhythm, or natural transitions. Compare your movement with video demonstrations by fluent Deaf signers and, when possible, ask a qualified ASL instructor for feedback.
How to practice the sign effectively
Start by checking one feature at a time. First form the flattened O handshapes. Next, place them near the forehead with the palms facing each other. Finally, add the synchronized forward movement. Once each part feels comfortable, practice the complete sign without pausing.
Record a short front-facing video rather than relying only on a mirror. During playback, check whether both hands begin at the same height, keep their shape, and finish together. Then place “teach” into several different sentences so that it becomes usable vocabulary rather than an isolated gesture.
If learning ASL connects with your educational or professional plans, it may also help to review strategies for comparing courses and career paths before selecting a class or training program. Look for instruction that includes interaction, grammar, Deaf culture, and feedback—not vocabulary memorization alone.
A quick way to remember “teach”
Picture knowledge beginning near your head and moving outward to another person. Form two flattened O handshapes near the upper face and move them forward together once or twice. Keep the motion compact, the hands synchronized, and the fingers in position. With regular sentence practice and feedback from fluent signers, “teach” becomes a natural and useful part of everyday ASL conversation.